
Updated: 1/5/2019 | January 5th, 2019
Today, professional photographer Laurence Norah of Finding the Universe, continues his five-part series on taking better travel photos. Many of you are looking to improve your travel photography so Laurence is here to help us do just that. In this post, Laurence goes in-depth on how to pick the perfect travel camera and gear for your trip.
There is a belief that better photography gear will equate to better photographs. While this is certainly the case in specific situations, the reality is that it is the skill of the photographer that makes all the difference. A pro-level camera in inexperienced hands will likely result in worse photographs than those taken by someone using an iPhone.
Knowing how to compose a great photo and how to use your camera properly are the two most important parts of taking a great photo, with the camera gear itself coming next in importance after these two.
Sometimes, gear does make a difference, particularly for situations such as fast-moving subjects or when there is less light available, in which case you might need a camera with a bigger sensor or a lens with a wider aperture. This is why you often see sports or wedding photographers carrying such expensive-looking equipment. But for your average travel photograph, the gear isn’t going to be the definitive factor. Rather, it’s important to get the right gear for you, your budget, and your skill level.
How much money do you want to spend?
There’s no point spending time looking at gear that isn’t in your budget. Set yourself a budget before you begin, and don’t forget to factor in lenses, memory cards, spare batteries, filters, and other accessories.
There is a law of diminishing returns, with a sweet spot currently of around $500–1,000 USD for a solid setup that will do everything you need.
Consider these price guidelines for all the equipment you’ll need:
- Budget: $150–300 USD
- Value: $300–500 USD
- Mid-range: $500–1,000 USD
- High-end: $1,000+ USD
How much gear are you willing to carry?
Weight is a serious consideration, and you have to be brutally honest with yourself about what you are willing to carry with you. I’ve often met people taking pictures with their smartphone who say they have a nice expensive DSLR sitting back in their hotel room that was “too heavy to bring out today.”
If you’re not the kind of person who wants to carry a heavy device, then don’t buy one in the first place. The best camera is always the one you have on you, so if you think you’re going to mostly just be keeping it light, then just invest in a decent smartphone or simple point-and-shoot.
For reference, your smartphone probably weighs around 6 oz., a point-and-shoot 8 oz., a mirrorless system with a lens around 16 oz., and a full DSLR system around 30 oz. or more.
The heavier the equipment, the higher the quality of construction, particularly of the optical elements, leading to higher-quality images. However, unless you are planning on selling your work for high-resolution printing, the difference probably won’t be noticeable.
This is another moment to be honest with yourself. Learning how to use a camera properly takes time, and if you don’t want to do that, then don’t invest in an overly expensive or complicated camera.
I’ve seen people with rigs costing in excess of $5,000 USD, shooting away in auto mode and wondering why the folks with the iPhones are getting better results. More expensive gear does not automatically equate to better photos!
There’s no exact science to figuring out how difficult a camera is to use, but difficulty indicators include costing more, having more buttons, and having a massive manual. The more complicated the camera, the more control that you have, but the harder it will be to achieve good results without investing time and effort into learning.
11 Best Cameras for Travel
The main difference between camera types is the size of the sensor inside the camera — the larger the sensor, the better the camera will perform in lower light, and the bulkier and more expensive it will be.
The following list is roughly ordered by sensor size, from small (smartphones) to larger (SLRs).
Getting the Best Travel Lens
If you are buying a mirrorless camera or SLR system, then you’re going to have to buy a lens. Consider spending at least as much on the lens as the camera body, if not more.
I suggest buying the camera body by itself and then buying a lens to meet your needs rather than the “kit-lens” that might come with it.
A lens has two specifications: focal length and maximum aperture.
The smaller the number of the aperture, the more light the camera will let in, allowing you to achieve various effects (as I described in the second post in this series).
The focal length is the zoom factor of the lens — the bigger the number in mm, the more magnification the lens offers; the smaller the number, the less magnification.
What to look for in a lens
For travel purposes, I’d advise buying two lenses:
- A cheaper “prime” lens with a fixed focal length of around 50mm and an aperture of 1.8, perfect for portraits or food.
- A good-quality “walk-around” zoom lens with a wide focal range to let you get everything from wide landscapes to close-up shots of people. Something in the range of 24-105mm would likely do.
The Best Travel Photography Accessories
You must factor in some money for purchasing accessories when buying a camera. I’d suggest the following:
- Spare battery: Most camera batteries last for 300-500 shots, so if you think you’ll be taking a lot of photos and might be away from power for a few days, a second battery could ensure that you don’t miss a moment. I’d advise buying the battery from your manufacturer to guarantee compatibility. Price: usually around $30 USD.
- External hard drive: Depending on the capacity of your laptop, you might find you need an external hard drive to store your photos. I travel with three Transcend ruggedized hard drives and store backups of my photos across two of them, as well as synchronize them to a cloud-based backup when I have fast enough Internet. Price: currently around $99 USD for a 2TB model.
- Filters: Lenses aren’t cheap. Pick up a relatively inexpensive UV filter for the front of your lens, and if you scratch it, you’ll just need to replace the filter rather than the whole lens. I would also suggest investing in a polarizing filter (as I mentioned in the second post in the series). Price: the larger the filter, the more expensive it is. $10–100 USD, with Hoya, B+W, and Tiffen being respectable brands.
- Memory cards: Memory cards are cheap, so pick up one or two Class 10 32Gb or 64Gb cards that’ll let you keep shooting for ages. I’ve not found much difference between brands, and have never had a card fail in all my years shooting. Price: $30 USD for 64Gb.
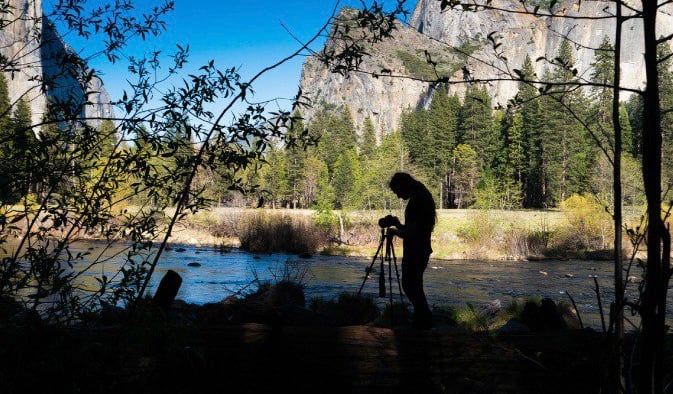
- Tripod: A tripod can really expand your creative possibilities, letting you take longer exposures and play with time. Even a small travel tripod can reap dividends for your travel photography. Again though, if you don’t think you’ll use it, don’t buy one. Price: $100 USD will get you a perfectly respectable model. I use the VEO range of Vanguard tripods, which fit nicely into a bag and weigh around 5 lbs, with prices ranging from $100 to $350 USD.
***
Never forget that the most powerful photography tool is you — not your camera! I traveled the world with an old 10-megapixel Canon Rebel SLR for years, producing both award-winning and income-generating photography from — by today’s standards — a very basic bit of kit.
It is far more important to invest time in learning how to take better photos than throwing money at gear. Do your research, figure out your personal travel style, and pick the gear that is right for you, based on weight, price, and your personal learning goals.
If that camera turns out to be a smartphone, awesome. The best camera for traveling is the one you are going to be taking with you whenever you walk out your door and head into the world and the one that fits your budget.
Laurence started his journey in June 2009 after quitting the corporate life and looking for a change of scenery. His blog, Finding the Universe, catalogs his experiences and is a wonderful resource for photography advice! You can also find him on Facebook, Instagram, and Twitter.
More Travel Photography Tips!
For more helpful travel photography tips, be sure to check out the rest of Laurence’s travel photography series:
Book Your Trip: Logistical Tips and Tricks
Book Your Flight
Find a cheap flight by using Skyscanner or Momondo. They are my two favorite search engines because they search websites and airlines around the globe so you always know no stone is left unturned.
Book Your Accommodation
You can book your hostel with Hostelworld. If you want to stay elsewhere, use Booking.com as they consistently return the cheapest rates for guesthouses and cheap hotels. I use them all the time.
Don’t Forget Travel Insurance
Travel insurance will protect you against illness, injury, theft, and cancellations. It’s comprehensive protection in case anything goes wrong. I never go on a trip without it as I’ve had to use it many times in the past. I’ve been using World Nomads for ten years. My favorite companies that offer the best service and value are:
- World Nomads (for everyone below 70)
- Insure My Trip (for those over 70)
Looking for the best companies to save money with?
Check out my resource page for the best companies to use when you travel! I list all the ones I use to save money when I travel – and I think will help you too!


